Blog
How to DIY a LiFePO4 Battery Pack: A Step-by-Step Guide for Beginners
2025-07-28 | Eric
Hey everyone! I’ve been digging through the buzz on DIY forums and social media, and one thing’s clear—people are seriously pumped about building their own LiFePO4 battery packs. Questions like “How do I start a DIY LiFePO4 battery?” or “What’s the trick to making a solid DIY LiFePO4 battery box?” keep popping up. You’re wrestling with cell testing, BMS headaches, and wondering if it’s really worth the hassle. Been there, done that, and now I’m here to walk you through it step-by-step.
What Is a LiFePO4 Battery Pack?
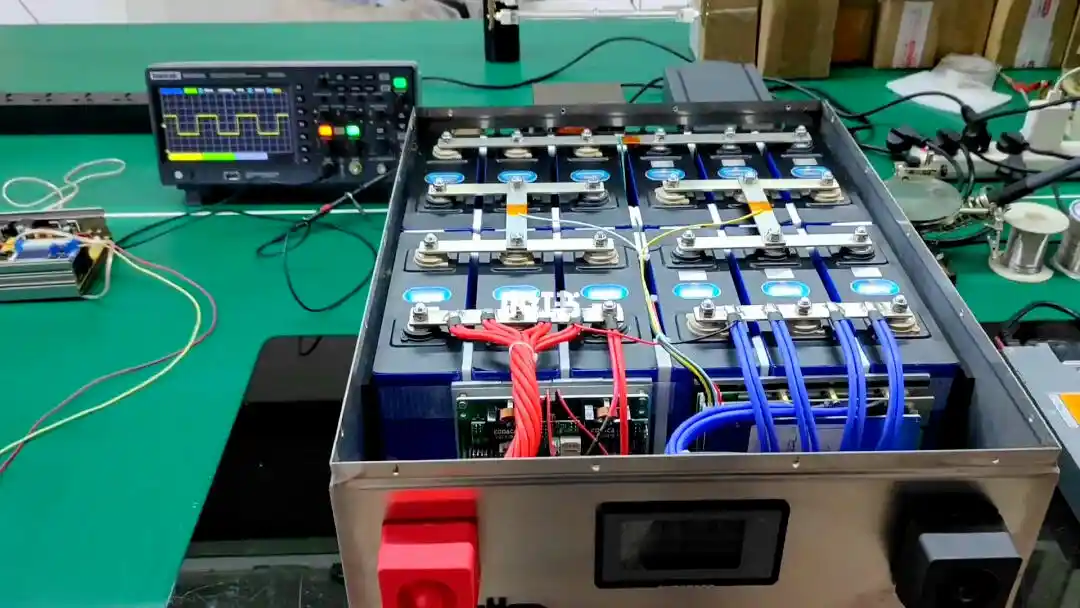
In simple terms, it’s a bunch of LiFePO4 cells wired together—either in series or parallel—to make one powerful battery unit. You’ll find these packs powering everything from home solar setups and electric bikes to off-grid camping gear. They’re popular because they’re safe, long-lasting, and efficient.
Why DIY a LiFePO4 Battery Pack?
From lurking on your discussions, I get what’s driving you to build your own pack:
- Save Money: Pre-made packs can cost a pretty penny. Many of you want to cut costs by doing it yourself.
- Custom Fit: Whether you need a tiny pack for a camping lantern or a beast for a solar backup system, DIY lets you tailor it exactly to your needs.
- The DIY Spirit: Tons of you love getting hands-on, learning how batteries work, and flexing those skills.
- Safety & Time Concerns: Some of you hesitate because of safety worries or the time it takes, which is totally valid. I’ll get into those soon.
Essential Materials and Tools
Picking the right parts is where many get stuck, so here’s the lowdown:
Batteries
Grab LiFePO4 cells (3.2V each), either prismatic or cylindrical. These cells are more stable and safer than other lithium types, perfect for DIY beginners.
Pro tip: Match your cells tightly. Look for capacity differences under 5% (like 95Ah to 100Ah in a 100Ah pack), internal resistance differences below 1mΩ, and even test their self-discharge over 72 hours. Mismatched cells age unevenly and can trash your whole pack. If you’re using used cells, check their cycle counts—pairing a cell with 200 cycles with one at 50 is a recipe for disaster.
Always go for UL or CE certified cells—trust me, you don’t want cheap, sketchy batteries that might overheat or fail.
BMS (Battery Management System)
This tiny but mighty board protects your pack from overcharging, over-discharging, and short circuits. Skipping this is asking for trouble.
Battery Box
Choose a case made from high-temp plastic, aluminum, or even 3D-printed materials. Plastic is light, metal is tough—pick what fits your vibe and setup.
Inverter
If you plan to power AC appliances, you’ll need a DC-to-AC inverter. If your devices run on DC, you can skip this.
Tools & Accessories
- Multimeter (to measure voltage)
- Soldering iron (for wiring connections)
- Screwdriver (for assembly)
- Nickel strips (for spot welding cells)
- Heat shrink tubing (for insulation)
- Proper gauge wires and terminal connectors (avoid cheap wires—overheating isn’t fun)
Step-by-Step DIY Process
Ready to build? Let’s dive in.
Plan Your Needs
Decide your voltage and capacity goals. For example, 4 cells in series (4S) give you 12.8V; cells in parallel add capacity. A 4P setup with 100Ah cells yields 400Ah. Sketch your setup: Is it for solar, camping, or something else? This will help you pick the right cells.
Test LiFePO4 Cells
Before wiring up, test each cell:
- Capacity: Charge to 3.65V, discharge to 2.5V, and note amp-hours (Ah). Aim for a 2–5% variance; anything bigger messes with pack balance.
- Internal Resistance: Use your meter—less than 1mΩ difference between cells is ideal. Higher resistance means heat and power loss.
- Voltage: Resting voltage should be similar, around 3.2–3.3V. Outliers usually die fast; toss those.
Connect Batteries
- Series Wiring: Connect positive of one cell to negative of the next to boost voltage (e.g., 4S = 12.8V).
- Parallel Wiring: Connect all positives together and all negatives together to increase capacity (e.g., 4P = 400Ah).
Use spot welding with nickel strips to join cells safely. Soldering directly on cells is risky—it can overheat and damage them. Always double-check polarity with a multimeter. Reversed connections can spark and ruin everything.
Install BMS
Pick a BMS matching your setup (e.g., 4S 100A for 12V 100Ah). Wire the BMS carefully—battery negative (B-) to pack negative, load negative (P-) to your output. Follow the wiring diagram to the letter. Test by charging to full (14.6V for 4S) and see if the BMS cuts off charging. Discharge and watch for low-voltage protection. Mistakes here can fry your pack.
Build the Battery Box
Place your cells snugly inside your battery box. Drill vent holes to prevent overheating, add padding to reduce vibration damage, and seal edges to keep moisture out. Loose cells shift and short easily—secure them tight.
Add Inverter (If Needed)
Connect inverter input to BMS output (positive to positive, negative to negative). Test with a small load, like a 60W bulb. Don’t push the inverter beyond its rated capacity—start small and scale up.
Test the System
Check overall pack voltage (e.g., 12.8V for 4S). Fully charge, then discharge with a load (like 100W), monitoring temperature (stay below 50°C). Measure each cell’s voltage during discharge—big differences mean bad connections or failing cells. Adjust and retest; rushing kills packs.
Key Precautions for a Safe DIY LiFePO4 Battery Pack
Your safety is everything—here’s what you need to nail:
- Connections: Tighten all terminals; loose ones cause sparks or power loss.
- BMS Matching: Use a BMS rated for your pack’s max current. A 50A BMS on a 100A pack won’t protect you.
- Temperature: Operate between 0–45°C. Too hot ages cells fast; too cold cuts capacity.
- Maintenance: Monthly voltage checks and terminal cleaning keep your pack healthy.
- Safety: Store your battery pack in a fireproof area, use good insulation, and never short-circuit.
Conclusion
Watching you tackle DIY LiFePO4 battery projects has been inspiring. It’s equal parts challenge and satisfaction. Follow these steps, keep safety your north star, and you’ll end up with a battery pack that’s truly yours—custom, powerful, and built to last.
FAQ
What Happens If I Skip the BMS?
Overcharging can fry cells, over-discharging kills them, and shorts can spark fires. I’ve seen DIY packs ruined in days—don’t skip the BMS.
Can I Expand a DIY LiFePO4 Battery Pack?
Yes, but only if the new cells match your existing ones in capacity and voltage, and you rebalance the pack. Mixing mismatched cells causes uneven wear and pack failure.
Can LiFePO4 Mix with NCM/NCA Batteries?
Nope. Different chemistries and voltage curves don’t mix well and can wreck your pack. Stick to pure LiFePO4 for best results.
There you have it—a down-to-earth, no-nonsense guide to DIY your LiFePO4 battery pack. Ready to get building? Let’s power up!
Popular Articles
Contact Details
Worktime :Monday to Friday 9am - 6pm (HKT)
WhatsApp/Wechat/Mobile :+8613645616165
Email : info@lifepo4cellstore.com